Showing posts with label Baking. Show all posts

Monday, February 19, 2018

Lemon Meringue Pie

I love lemons, they are one of my favorite flavours, so lemon meringue pie is a definite favorite in my house.  My mum used to make a fab pie that is the stuff of family legend, so I can only hope to get somewhere close to that.  My take on it is based on Mary Berry's pie but I use normal shortctust pastry for the base rather than the biscuit version she uses.

Shortcrust Pastry
180g flour
90g butter
iced water

Filling
397g tin condensed milk
3 large egg yolks
finely grated rind and juice of 3 lemons

Topping
3 large egg whites
175g castor sugar
  • Preheat the oven to 170c
  • Make the shortcrust pastry by rubbing the butter into the flour either by hand or with a food processor or with a stand mixer.
  • Sprinkle about 3 tbsp of iced water over the mixture and stir in using a  knife.  Bring the mixture together with your hands to form a smooth paste.  If the mixture does not come together add a little more water.  Form the pastry into a disc and wrap in clingfilm and rest for 30 mins.
  • Roll out the pastry and line an 8inch pie dish.
  • Cut a circle of greaseproof paper a bit bigger than the pie dish and use it to line the pastry case, fill with baking beans.
  • Blind bake the pastry for 20 mins, remove the beans and paper and bake for a further 5 mins until the pastry is golden.
  • Make the filling by pouring the condensed milk into a bowl then beat in the egg yolks, lemon zest and juice
  • Pour the mixture into the pastry case.
  • Whisk the egg whites till stiff. Gradually add the sugar a spoon at a time whisking well in between each spoon until the mixture is very stiff.
  • Spoon over the pie.
  • Bake for 20mins, leave to cool for 30mins then eat warm.


Monday, January 08, 2018

Epic Christmas Pie

I wanted to carry on with my pastry practice over Christmas so found this rather epic Christmas pie on the Goodfood website.  I'd not used a spring form tin for pastry before, but it came out really well and I'll definitely try it again.  I did deviate from the recipe by making the pastry from scratch rather than pre made.  One thing I did mess up was measuring the ingredients for the pastry, I convinced myself that the ration of flour to fat was 1:1  instead of 2 flour:1 fat. Oops! I had to start again with the first batch of pastry, but got it right second time, and it's not a mistake I will make again!

For the pastry
250g butter
500g flour
Iced water

For the filling
2 tbsp olive oil
knob butter
1 onion finely chopped
500g sausagemeat
grated zest of 1 lemon
100g fresh white breadcrumbs
85g dried apricots, chopped
50g chestnuts, chopped
2 tsp chopped fresh or 1 tsp dried thyme
100g cranberries
500g boneless, skinless chicken breasts
1 egg beaten to glaze
  • Make the pastry by rubbing the butter into the flour either by hand or with a food processor or a stand mixer, until it resembles breadcrumbs.
  • Sprinkle about 3 tbsp of iced water over the mixture and stir in using a  knife.  Bring the mixture together with your hands to form a smooth paste.  If the mixture does not come together add a little more water.  Form the pastry into a disc and wrap in clingfilm and rest for 30 mins.
  • Whilst the pastry rests make the filling.  Heat oven to 190c/170fan/gas 5.
  • Heat the oil and butter in a frying pan, then add the onion and fry for 5 mins until softened,  Cool slightly. Tip the sausagemeat, lemon zest, breadcrumbs, apricots, chestnuts and thyme into a bowl.  Add the onion and cranberries and mix everything together with your hands, adding plenty of pepper and a little salt.
  • Cut each chicken breast into three fillets lengthwise and season all over with salt and pepper. Heat the remaining oil in the frying pan and fry the chicken fillets until browned, about 6-8mins.
  • Roll out the thirds of the pastry to line a 20-23cm springform tin.  Press in half the sausage mix and spread to level.  Then add the chicken pieces in one layer and cover with the rest of the sausage mix.  Press down lightly.
  • Roll out the remaining pastry.  Brush the edges of the pastry with beaten egg and cover with the pastry lid.  Pinch the edges to seal, then trim.  Brush the top of the pie with the egg, then reroll the trimmings to make holly leaf shape and berries.  Decorate the pie and brush again with egg.
  • Set the tin on a baking sheet and bake for 50-60mins, then cool in the tin for 15 mins.  Remove the tin and leave to cool completely.


 This is a really good pie recipe that really hits all the Christmassy flavours without being too overpowering.  I'll definitely be making it again and trying other epic pies!

Friday, December 22, 2017

Quiche Lorraine

More pastry practice! This time a savoury recipe, and who doesn't like a good quiche lorraine? This recipe is from BBC Good Food again (love the magazine) and is really rich and creamy.

For the pastry
175g plain flour
100g Cold butter cut into small cubes
1 egg yolk

For the filling
200g lardons
50g Gruyere cheese
200mls creme fraiche
200mls double cream
3 eggs, well beaten
pinch ground nutmeg

  • For the pastry, put the flour, butter, egg yolk and 4 tsp cold water into a food processor.  Using the pulse button process until the mix binds (alternatively mix with stand mixer or rub the butter into the flour with your hands and stir in the egg yolk).  Tip the pastry onto a lightly floured surface, gather into a smooth ball then roll out as thinly as you can (controversially don't rest the pastry!)  Line a 23 x 2.5cm loose bottomed fluted flan tin, easing the pastry into the base. Trim the pastry edges with scissors (save the trimmings) so it sits slightly above the tin (if it shrinks it shouldn't now go below the level on the tin).  Press the pastry into the flutes, lightly prick the base with a fork (called docking) and chill for 10mins.  Put a baking sheet in the oven and heat to 200c/180c fan/gas 6.
  • Line the pastry case with foil, shiny side down, fill with dry beans and bake on the hot sheet for 15mins.  Remove foil and beans and bake for 4-5mins more until the pastry is pale and golden.  If you notice any small holes or cracks patch up with pastry trimmings.  You can make up to this point a day ahead.
  • Whilst the pastry cooks prepare the filling.  Heat a small frying pan, tip in the lardons and fry for a couple of mins,  Drain off any liquid that comes out, then continue cooking until the lardons just start to colour, but arn't crisp. Remove and drain on paper towels.  Cut three quarters of the cheese into small cubes and finely grate the rest.  Scatter the diced cheese and fried lardons over the bottom of the pastry case.
  • Using a spoon beat the creme fraiche to slacken it, then slowly beat in the double cream. Mix in the beaten eggs.  Season (you wont need much salt due to the lardons) and add the nutmeg.  Pour three quarters of the filling into the pastry case.
  • Half pull the oven shelf out and put the flan tin on the baking sheet.  Quickly pour the rest of the filling into the pastry case-you get it right to the top this way.  Scatter the grated cheese over the top, then carefully push the shelf back into the oven (having someone else to help really makes this easier!).  Lower the oven temp to 190c/170c fan/gas 5.  Bake for about 25mins or until golden and softly set (the centre should not feel too firm).  Let the quiche settle for 4-5 mins, then remove from the tin.  Serve freshly baked, but it's also good cold.
This recipe turned out really well; it tasted really good.  I did get some pastry shrinkage, but leaving the excess pastry attached sorted that out. Also, I nearly had a disaster when taking the pastry case out of the oven after blind baking it, it came out of the case, so I had to carefully slot it back in, not easy when wearing oven gloves... but I'll definitely be making this recipe again.

Saturday, December 16, 2017

Mince Pies

Because it's just not Christmas without mince pies! And it's a good opportunity to practice sweet shortcrust pastry.  This time I tried Paul Holywood's pastry recipe, which has a very high fat to flour ratio, making for a slightly more sticky dough that needs a bit of patience to work with as it tears quite easily, but equally it's easy to pat it back together again.   I was inspired by Nigella to top my pies with cut out shapes rather than traditional lids.  However, the high butter content makes the cut pastry loose its shape a bit when baked, so my nice sharp snowflakes look a bit melty on baking.  I must admit I did cheat and use store bought mincemeat, but I actually really like the shop bought kind so what the hey!

Ingredients
Large jar of mincemeat, I used Waitrose 800g jar
375g plain flour
260g butter
125g caster sugar (I used vanilla sugar)
1 large egg beaten

Rub the butter into the flour until it resembles fine breadcrumbs-I used my stand mixer to do this.
  • Stir in the sugar.
  • Beat the egg and sprinkle over the flour mixture.
  • Use a knife to stir the mixture until it clumps together, then turn it out onto a floured surface and knead gently into a smooth paste.  Wrap in clingfilm and chill for 30mins.
  • Preheat the oven to 220c/200c fan/gas mark 7
  • Once rested, cut the dough in half and roll out to 3mm thickness.  Using a round cutter, cut out rounds for the pie bases. Press gently into the muffin trays.
  • Fill the pastry cases with the mincemeat.
  • Reroll the pastry and cut out snowflakes or ivy leaves and top the pies with them.
  • Continue cutting out the pastry til it is all used, I got 14 pies from this quantity of pastry.
  • Brush the tops with egg wash or milk.
  • Bake for 15 to 20 mins until golden brown, then leave to cool before turning out of the tins.  Dust with icing sugar to serve.


Sunday, December 10, 2017

Tarte au Citron

In my continuing attempt to master pastry I decided to make a Tarte au Citron this week.  I used the recipe from my Leith's Baking Bible but instead of making a Pate Sucree I used the sweet rich shortcrust pastry recipe as its a lot simpler! The Pate Sucree recipe involves many more complicated steps and french terms, when I have the hang of shortcrust I may try it, but not just yet...

For the Sweet Rich shortcrust Pastry for a 20cm/8inch tart tin
170g/6oz plain flour
A pinch of salt
100g/3 1/2oz cold butter
1 egg yolk
2 tablespoons ice cold water

For the filling
4 eggs
1 egg yolk
200g/7oz caster sugar
150ml/ 5 fl oz double cream
grated zest and juice of two lemons

To finish
icing sugar, sifted

  1. Sift the flour and salt into a large bowl.  Cut the butter into 1cm cubes and add to the flour.
  2. Rub the butter into the flour, either by hand, or in a food processor or a stand mixture.
  3. Stop when the mixture resembles fine breadcrumbs.  Mix the egg yolk with the water and sprinkle over the flour mixture
  4. Stir with a knife until the mixture begins to clump together.  If the mixture is still a little dry sprinkle in a little more water.
  5. Bring the mixture together with you hands and gently press into a smooth paste. Form into a disc, cover in cling film and refrigerate for at least 30mins
  6. Once rested, take the pastry out of the fridge and roll out onto a lightly floured surface or a piece of bake-o-glide.
  7. Line an 8 inch tart tin with the pastry and return it to the fridge to rest again for another 30mins
  8. Preheat the oven to 190C/ Fan 170 
  9. Line the chilled pastry shell with baking parchment and fill with baking beans and blind bake for 15 mins
  10. Remove the beans and bake again for 5-10mins until the pastry is golden and sandy to touch.
  11. Lower the oven temperature to 170c/Fan 150
  12. Mix the eggs, yolk and sugar together until smooth, then strain through a sieve to remove any eggy threads.  Stir in the cream.  
  13. Add the lemon zest and juice; the mixture will thicken considerable.
  14. Pour the lemon filling into the pastry case and bake for 50mins until almost set.  Check the tart periodically and if the pastry and filling is starting to brown too much cover with foil.  Be careful not to let the foil touch the filling as it will stick.
  15. When the tart is cooked remove the tart tin and leave to cool
  16. To serve dust thickly with icing sugar and serve with cream. 

I was quite pleased with how the tart turned out, the pastry was nice and short with no soggy bottom, and it certainly tasted good.  Sadly, the foil I covered the tart with to prevent it burning got stuck to the filling so the surface was a bit ruffled up, but a good helping of icing sugar helps cover it up.

Saturday, December 02, 2017

Plum and Marzipan Pie

I like to think that I am a pretty proficient baker, but I do have a kryptonite.... pastry.  It's a completely unreasonable fear, as all pastry is, is a mixture of fat, flour and water - fundamentally not scary at all!  But I've had a few bad experiences with pastry not working and I must admit that I usually just buy pastry ready made cos its easier.... But no more! I refuse to be scared of a food, so I am going to practice making pastry til I can do it properly (and I'll get pie!), it shall be my pastry project.  I've managed a pecan pie and a lemon meringue pie so far, but I thought I'd do a blog about a lovely pie I found in my BBC Goodfood magazine which uses sweet shortcrust pastry.  It's a Plum and marzipan pie, two of my favorite things.

For the pastry
225g cold unsalted butter, chopped into small pieces
350g plain flour
50g icing sugar
1 large egg yolk (save the white for brushing the pastry)

For the filling
1kg plums (Victoria or Excalibar plums are delicious if you can find them), halved, stoned, then halved again
100g golden caster sugar, plus extra for sprinkling
2 tsp cornflour
1 tbsp ground almonds or fine polenta
1 tsp almond extract
200g marzipan, chopped into 1½ cm cubes
egg white, for brushing (reserved from making the pastry)
cream or ice cream, to serve

Method
  1. Put the butter and flour in a food processor with 1/4 tsp salt and blend until the mixture resembles damp breadcrumbs.  Or do this by rubbing the butter and flour together in a big bowl with your fingertips. (Or you can use a stand mixer fitted with a paddle attachment).  Add the sugar and stir to combine.
  2. Whisk the egg yolk with 2 tbsp ice cold water and drizzle over the flour mixture.  Stir with a knife to blend the mixture until it starts to form larger clumps.  If the mixture is too dry add a little more water a tsp at a time.
  3. Tip out onto a work surface and briefly knead the dough to bring it together as a smooth ball.  Avoid overworking or it will become tough.  Flatten the dough into a puck shape and wrap well in cling film.  Chill for at least 30 mins, or for up to two days, or freeze for 2 months.
  4. Tip the plum,s sugar and cornflour into a large pan and toss to coat.  Simmer for 3-5mins stirring now and then, until the plums have just begun to soften.  Tip them into a sieve suspended over a large bowl and leave for 30 mins - 1 hour stirring every 10mins, until the juice has all collected in the bowl.
  5. Remove the dough from the fridge and divide into 2 pieces, one slightly bigger than the other. Re-wrap the smaller piece of dough and set aside.  On a lightly floured surface (or a piece of bake-o-glide, seriously nothing gets stuck to it!) roll out the dough to the thickness of a 50piece, or until large enough to line the base of your pie plate or tin, with a little pastry overhanging.  Roll the dough on your rolling pin and lift onto the plate or tin and press it well into the corners.  Scatter the almonds or polenta over the base.
  6. Stir 2 tbsp of the strained plum juice and the almond extract into the plums.  Spoon the filling into the pie dish, dotting the marzipan between the layers of plums as you go.  Heat the oven to 190c/170c fan/ gas mark5 and place a baking sheet on the middle shelf.
  7. Top the pie with a lattice crust. Roll out the remaining pastry and cut into 1.5cm wide strips.  You can see step by step images on creating a lattice crust here.  First, arrange the pastry strips on top of your pie, with a small space between each one.  Fold back alternate strips from the centre then lay a strip across the middle near the folds.  Next flip the folded strips back to cover the middle pastry strip.  Fold back the strips that are woven under the middle piece.  Lay another strip across the middle and flip alternate strips back again.  Repeat until you have a woven pattern.
  8. Once covered, whisk the reserved egg white and brush over the pastry/  Scatter with a little extra sugar and bake for 45 mins until golden and bubbling.  Cool for 10mins before serving with cream or ice cream.
Now I must admit I got a bit of pastry shrinkage on baking, which probably means I added a bit too much water when making the dough.  Also, the recipe does not chill the pastry once in the the dish, which I've seen recommended on other websites as helping to stabilise the dough.  Next time I'll try this and hopefully get less shrinkage.  But the pie tastes lovely and was definitely a successful attempt at sweet pastry.

Tuesday, November 17, 2015

Limoncello, another cookbook used!

In my continuing quest to use my cookbook collection properly I finally tried a recipe from Gifts from the Kitchen.  I bought this book before Christmas a couple of years ago, with the intention of making gifts for family and friends. As usual my health had other ideas, and whilst I've read all the recipes, I never managed to actually make one. However, with Christmas coming again, I decided to try out the limoncello recipe. I doubled the amount tho, so that if it's any good I can keep a bottle for us!

It's a very simple  procedure, you peal a dozen lemons of their rind and then boil that and the juice of the lemons in a sugar syrup for a quarter of an hour.
Many lemons
Naked lemons!
The juicing of the lemons was made infinitely easier by our marvelous gadget which we call the lemon inverter, as basically you pop half a lemon in the press and squeeze the two halves together and ta-da, one inside out lemon half and all the juice in the pan. It helps having a strong husband on hand as well!
As you boil the syrup it gradually darkens to a lovely rich orange. Once it's simmered for 15 minutes or so you decant it into a Kilner jar, or other sterilised sealable vessel and add a large amount of vodka. You then leave it alone to mature for a month or so and hopefully it will taste delicious when we try it out.  I'll let you know how it turns out...
A lot of potential Limoncello :-)

Monday, November 02, 2015

Toffee nut slices and a disaster possibly averted!!


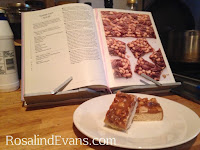
So, in my attempt to start using my cook bools properly I decided to start with one of my least used purchases- Peyton and Byrne's British Baking.  It's a beautifully illustrated edition and contains a selection of recipes from tea breads to classic British puddings, and its purple my favorite colour so of course I got sucked in by amazon and bought it at least three years ago! (It's still available at amazon here).  And I'm afraid I've only ever used one recipe for Lemon Possett, and that works really well, so I had high hopes for the Toffee Nut Slices recipe.  The recipe combines two of my favorite things- nuts and toffee (obviously!).


See how gorgeous the illustrations are.  You start the slices by making a fairly basic buiscuit base from butteer sugar and flour. This was one of my problems with this recipe, I used the exact tin specified and I ended up with a very thick base, much more so that pictured, I personally wold prefer a thinner base. so next time I will reduce the biscuit amount.  But that's just a little nigggle!


You start by toasting the nuts on the oven, watching them like a hawk as they can go from toasted to chared in a very short time! This also makes your kitchen smell amazing...
Once they are toasted and cool you rub them gently between your hands to remove any remaining skin- a surpriing amount of it comes off and would have not have enhanced the end result.
Once you've done the nuts you start on the toffee.  Now, as always be very careful when dealing with boiling sugar as it's very, very hot and easy to burn yourself! Also, it's wise to have any things that will be added to the sugar, in this case butter and cream, measured and ready to add, as trying to faff with scales whilst your toffee burns is not a happy thing! I had another problem here in that the amount of water used to dissolve the sugar is really small and as my sugar just about to burn a crisp, I added a couple of tablespoons of extra boiling water to get it to melt properly.  In all my other cookbooks that deal with toffee making, there is always more water in the recipe for a similar amount of sugar, so I would have some boiling water on had just in case your sugar starts to catch rather than melt.  Practicing making toffee is going to be something I need to do to avoid burnt sugar!


This recipe does not use a sugar thermometer to make the toffe, but instead relies on you judging the colour of the toffee-living dangerously or what!  And this is where disaster struck...  Whilst trying to take an action shot of stirring the toffee, I dropped my Iphone into the saucepan of boiling toffee...! I am blaming this on the fact that I am taking steroids at the moment so am rather jittery... that's my story and I'm sticking to it.  Fortunately Mr EB was there to help me fish it out and saved the day my cleaning it up and somehow neither of us got scalded by the hot sugar!  Even more Amazing is the fact that the phone still works!!! Totally gobsmacked by that!!

So after the little toffee apple  diversion, I added the nuts to the toffee and spread it onto the cooled biscuit base, and then bunged it in the oven for its final bake.
Once cooled, you chop it into slices and attempt not to eat all of it in one go.  It's a really moreish, but very sweet treat.  I will definitely be trying this recipe again, despite one or two little niggles with the recipe, it produces excellent results, I'll also be trying more P&B recipes to see if they are consistently this good.  One cookbook almost properly used!

Saturday, October 31, 2015

Books, books, books!

The time has come to admit I have a problem.  My problem is common in my family, we have an obsession with books.  I'm not just a bibliophile, my problem is more of an obsession with collecting books, I would say I'm a bibliomaniac!  I'm fairly certain it's genetic and I get it from both parents, so I was always doomed to love and adore books.  Whilst studying for my music degree I would source and horde books relevant (and not so relevant) to my subjects and spend more on my books than normal student purchases such as booze.  When I got really into sewing costumes my obsession moved onto fashion history and museum catalogues from the V&A filled with fabulous pictures and patterns that I could drool over when I should have been studying!  Getting into. RADA just validated my need for more sewing books and my problem only got more pronounced the more I read and bought.  Amazon has a lot to blame from my problem, they make it so easy and simple to just buy, buy, buy, with a single click and then the next gorgeous tome arrives within 24hours.  Yes I know Amazon is a dreadful, tax dodging corporate giant, but I'm only human and I have to have my book fix!  My sewing and costume collection now tops a hundred, wonderful volumes that keep me happy for hours. I've even started a catalogue so that I know what I have and what areas need more attention- I'd also love to get book plates made so my collection is obviously all mine- mwahahaha! (Maniacal book loving laugh)

My other guilty book mania focuses on cookery books.  I am a total addict and always fall for a beautiful book of glorious photos, without really paying attention to the recipes.  I have loads piled high in the kitchen and it's getting to be a problem.  But I have admitted I have a problem, and that is apparently the first step on the road to recovery-although to be honest I'm not sure I want to recover as I love my books and no one is getting them off me! However, it does seem silly that I have all these cookbooks which do get read a lot, but I haven't actually tried the recipes out, which is their purpose after all.  My sewing books get read and the patterns and techniques used a lot, not so much now my health is poor but they have all had a good use, so I don't feel so bad about them.  But I know that some of my recipe books may have had only one recipe used from them, or sometimes none at all!  So before I'm allowed to buy more recipe books, I have to properly use the ones I have... I should also use some of the stacks of cooking magazines that I've also accumulated over the years. I'm nearly as bad at hoarding them as I am recipe books!  So out with the baking tins and mixer it's time to bake and cook- watch this space for my attempts to justify my cookbook bibliomania! 

Friday, June 12, 2015

Musings on MacarOn, MacarOON!

My favorite treat from the village bakery when I was little were the giant, chewy, almond macaroons with rice paper on the bottom, which at that age were about the size of my head! In recent years the macaron (note spelling!) has become a massive baking trend, and I do really like them but I certainly do not have the patience to make them as beautifully as you see them in fancy patisseries.  Whilst the basic ingredients are the same for the two, ground almonds, sugar and egg white, the way you blend them is different and for me that's what makes the difference between macaroons and macarons. You could also argue that macaroons are the English version of French macarons, as I have never seen macaroons in any french recipe book that I've read. Although, if you are going to get into baking geography the Italians might want to chip in with the fact that the word macaron is derived from the Italian macarone or maccherone which means meringue and is what macaro/ons are both basically made of.  For some people, macaroons are in fact made with shredded cocnut and not nuts at all, but seeing as I loathe shredded coconut with a passion, you won't find any of that nonsense on this blog!  

Beautiful Laduree Macarons
Both confections are made by whipping egg whites with sugar to form a meringue base and then folding the almonds into this very gently to maintain the airiness of the batter so that they do not collapse when baked. I have tried making macarons several times with varying degrees of success. To get the distinctive crisp, smooth shell and a sort of ruffled bottom (that aficionados call its foot), macarons are usually made with very finely ground almonds, or almond flour and icing or confectioners sugar. This results in a much smoother mixture and also creates the distinctive shiny finish.  Two of these shells are then sandwiched together with butter cream (mmmm...) To make the classic Laduree macaron the shells have to be the same size which means you have to pipe the mixture out onto the baking sheets and I am just not patient enough for that!  Also, it makes so much more washing up and I inevitably get bored half way through the piping, which means I get sloppy, and I end up with different sizes, which then annoys me!  So whilst I can appreciate the beauty and deliciousness of the macaron, I will probably be a receiver and eater of them rather than a creator!

Macaroons on the other hand are so much easier to make and far harder to cock up- vital aspects for an easily bored baker like me!  This recipe is based on one I found in one of my Mum's ancient Reader's Digest cook books, but tweaked a bit to make the macaroons even more chewy.  Its very easy to scale the recipe up or down to however many egg whites you might happen to have.  One quantity of the mixture makes approximately 12 about 5cm in diameter.  I usually make 3 quantities, as these don't hang around for long!

Ingredients
1 egg white
3 oz caster sugar (90g)  If you have it use vanilla sugar.
2 oz ground almonds (60g)
Halved almonds to finish- one for each macaroon
Rice paper
(if you cant get rice paper use bake-o-glide on your baking trays as nothing sticks to it! You could try using baking parchment, but you may find they stick to it.  Seriously get some Bake-o-glide you can use it over and over again so it is totally worth it)

- Pre heat oven to 180C
- Line baking trays with rice paper or Bake-o-glide (the number of trays will depend on how much mixture you make)
- Beat the egg whites until they form stiff peaks.  If like me you sometimes have trouble telling if your egg whites are at stiff peak stage and panic about over beating them, then check out this post at the marvelous Joe Pastry website. The pictures and descriptions are great- no more under or over-whipped egg whites!  Unlike with macarons it's not the end of the world if you don't get the beating exactly right.
- Once you reach stiff peak stage, continue beating adding the sugar a tablespoon at a time allowing each one to combine fully before adding the next.
-  The mixture will become beautifully shiny and thick.  This is a basic meringue mix.
Would love to just stick my head in this bowl!
-  Gently fold the almonds into the meringue mix, trying not t deflate it too much.  A metal spoon or rubber spatula is ideal for this.  The mixture should be still quite stiff and thick, of you over stir it, it will get more liquid.  This isn't the end of the world it just means the finished macaroons will not rise as much and will probably spread more so will be thinner and crispier, but still yummy!
Fully folded mixture
- Using a couple of teaspoons, dollop the mixture out onto the rice paper, allowing space around each as they will spread a bit.
- Finish each macaroon with a half almond.
- If you want the macaroons to by extra golden you can brush the tops with egg white, but you don't have to.
Ready for baking
-Bake for about 12 minutes, but watch them like a hawk as they go from golden to burnt very quickly!  I was not eagle eyed enough and you can see a couple got a little bit crisped!

- Gently pull off the excess rice paper and then let them cool on a wire rack.

All done
And that's it really, except to eat and enjoy.  They'll keep for a few days in an airtight box, but mine usually disappear within 48 hours...

Friday, June 28, 2013

Toffeetastic

I must admit to having a big Amazon addiction! I can't help it, a love of books is a genetic condition in my family...  However, in this case a certain amount of blame must go to my lovely friend Helen, who had a copy of my latest purchase which I had a look through and totally fell in love with.  I was aware of this book as it's author Eric Lanlard is a favorite of mine, but having seen it in the flesh all my womanly resolve dissolved like hot sugar into cream!  So Amazon got more of my cash and I got Eric Lanlard's drool worthy new book Chocolat.  It is filled with gorgeous pictures and recipes that make your stomach rumble just reading them.  My first go was his Soft Chocolate Butter Toffee (see what I mean, even the name is yummy!).  Having braved fudge making  a few times I felt happy to tackle more boiling sugar and having ordered some liquid glucose specially from Ocado (how middle class am I!), I got to have a go.  The glucose is important as it makes the toffee beautifully smooth and not gritty.  The recipe does call for having three pans of ingredients being heated pretty much at the same time, so it is a little hectic, but as long as you've got everything measured out first it's fine.  If you have to weigh something in the middle of it I can see you easily burning the cream or sugar syrup. Toffee making is fairly similar to making fudge, in that you heat the sugar mix up to a specific point, as this is soft toffee you heat it to soft ball stage stirring like crazy, then let it cool slightly stir in the chocolate for flavour.  It is then poured into a lined cake tin and left to cool.  It makes a really creamy, chocolatey toffee, that is not too sweet as the chocolate used has a lot of cocoa solids in it.  I think this would make a lovely present to someone with a sweet tooth, so I may be making this a lot in the future!
Three pans all going! 
The Caramel being heated and finally the chocolate being stirred in.
The toffee poured into a baking tin to cool
Having cooled overnight it's much darker
Ready to cut up
Toffee Mountain!

Stored in a nice kilner jar.